I like to eat. A lot. Brian is the same way. His favorite food: food. And with an almost 6 year old and an almost 4 year old, we are constantly snacking, prepping or cleaning up from a meal.
Enter my genius, responsible, frugal and efficient friend, Rebekah Johnson. She came across this website that showed how to prep and assemble frozen meals for the crock pot. We decided to try it and this is what happened. This is not super funny but is a tedious explanation of said 6-hour method. (After a lot of FB hits, I thought writing it out would help some of you get over it and try something like this too! Or keep doing what you are doing and don’t freak out, thinking we are super moms. Just crazy enough to try this stuff!)
1. We and our husbands set aside a Friday night for a trial run. Our husbands are very involved, helpful PARENTS. (So Rebekah’s husband made homemade pizza (homemade dough even!) and the 4 kids and 2 men had a fun night playing while we did the cooking.)
2. We planned ahead. Rebekah organized recipes as we looked up various websites (see bottom of this for the sites). We decided to do 8 recipes, doubling some and only doing single amounts of some. Rebekah even organized a shopping list.
3. We shopped or gathered what ingredients were in the cabinet.
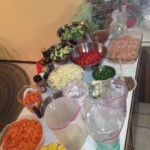
4. We started chopping, prepping, cooking and cleaning the fresh veggies and meat. This is what my kitchen looked like!
5. We sat down to eat dinner and chatted for a bit:) Doing this whole thing alone, we decided, would have left us bitter, tired and with aching feet. Doing this with a friend that you can cook with (!) was amazing.
6. We kept chopping (14 onions and 18 carrots take some time people!). We noticed we had similar kitchen habits. We have our “things” – Rebekah does organic milk a nd I do fair trade chocolate. But we also are super flexible and not germ-a-phobs in the kitchen. (I won’t say our habits b/c I don’t want a bunch of flak!) We also noted that we both like to clean as we go, instead of leaving a huge mess at the end. Doing this whole thing with someone who has completely opposite habits in the kitchen might have been a huge bummer. We managed to stay sane, friends and have fun during the whole thing. Proof of friendship: smiles.
Washing dishes as we went was key as I ran out of big bowls for the chopped veggies. We also kept using measuring spoons and cups so cleaning and drying them became super important.* Rebekah also took the time with her snazzy handwriting to write the name of the recipe, any further instructions and notes on the Ziploc bags with a Sharpie.
7. We began to assemble once all the prep work was done. Rebekah had heard to put the ziploc baggies with folded out edges inside of big pitchers. This worked for the most part until the pitchers couldn’t handle all ingredients. So we started to hold them or they could stand alone. There was no rhyme or reason to the order of ingredients in the bag. Big stuff first, spices and then liquids was the general rule. We also set aside the “to be added later” canned goods with the recipe name written on them for the pantry.
8. We loaded up the bags in our freezers in a semi-flat order. Make sure you have the room in that freezer! We did have to double bag a few of them.
The whole night was over around 11 but that was after a treat and come conversation with Brian and Rebekah after the kids finally fell asleep. We processed the … process and hoped none of the recipes will turn out to be too bland!
Success! About 20 meals for under $150, give or take because of so many ingredients on hand (honey, olive oil, spices, etc).
Now, which one will we eat first?!?!
*If we do this again, we will make sure to have more measuring utensils! And extra big bowls.—————————————–
Here are our recipes, shopping list and websites we used.
